Everybody loves a clean and sleek-looking car. The exterior is one of the first things we notice when looking at cars. The paint job makes a big difference in making sure that your car remains in top condition. While it’s not easy to do your own paintwork, it’s not an overly difficult task either.
With the right preparation, the right materials, and correct skills, you can “DIY” your way to a new paint job. You will not only save some money otherwise spent on a professional job, but you will also walk away with the feeling of accomplishing a big task. Here are some tips that you can follow for successful car painting.
10 Prepare Your Space

Painting your car requires time and space. You need an area that will be available for several days as you won’t be able to move the car during this process. Make sure your space is clean by sweeping the floor and hosing it down to remove dirt and debris. If you have a garage, make sure that you have a large enough area for you to be able to move around the car.
It’s advisable to prepare for all kinds of weather so it’s best to have a space that is covered. If your chosen area is a garage, make sure to check if there are laws that prohibit you from using certain types of equipment or paint, and ensure that you have proper ventilation.
9 Prepare Your Supplies

The materials you need for car painting will range from the supplies to do the painting and supplies for your safety. First, prepare your safety glasses and face mask. If you have a coat that can protect your clothes, use it as well. The materials that you will need for the actual paint job can be purchased from your local hardware or car shop.
You will need wet/dry sandpaper, an electrically powered sander, masking paper and masking tape, an air compressor, spray gun, thinner, primer, topcoat, lacquer, and buffer. If you know anyone who does bodywork and paints you can ask them if what you’re getting will work with the type of car you have.
8 Prepare the Car

Aside from cleaning the garage or any area, you’ll be using, you also need to clean your car. Make sure that you don’t need anything inside the car since you won’t be able to get inside for a significant amount of time. Clean the car by taking it to the car wash or doing it yourself. The important thing is that no oil or grease is in on the car’s surface as it will mess up the paint job.
Make sure that no dust is hiding in cracks and corners so there won’t be paint issues later on. Wipe the surface after washing using acetone, thinner, or a painting preparation formula. Check for rust and treat any you find before proceeding with your paint job.
7 Strip the Car

Stripping is perhaps the most labor-intensive part of painting a car. You can choose to manually do it or to use chemicals. The latter is not advisable in your home or a residential area since chemicals used for stripping have a harsh smell. It can be harmful, especially if there’s not enough ventilation. In manual stripping, you can use blasting or sanding.
Blasting involves materials like baking soda which helps break down the paint and makes it easier to strip the car. In sanding, you can use a 500-grit sanding block to remove paint and make the surface smooth. Using manual sanding is the only way to know if there are low and high spots on the surface of the car.
6 Protect the Car From Paint

Not all parts of the car's surface will be subjected to the painting job. To make sure you don’t get paint on the parts that don’t need it, protect them after sanding the car. You will need your masking tape and masking paper, plastic or cloth for this. Cover the windows, windshield, and side mirrors with paper. Secure them with masking tape. Use the tape to cover the other parts like the side trimmings, bumpers, and chrome.
Make sure that the edges are secured so no paint can get underneath. You can also get specialized products like foam masking tape or trim masking tape that are designed to be fitted and protect door gaps and car trims.
5 Prime the Car

Put on your mask, your glasses, and cover exposed skin to prepare for priming the car. A primer is important so that the paint will adhere to the car better and also acts as a protective layer to help prevent rust. Use a paint primer made for exterior purposes. Make sure you have good ventilation and start applying the primer evenly on every surface that needs paint.
When purchasing your materials ask the store to mix your primer for you or you can mix it yourself using 1 part acetone for every 5 parts paint. Using a spray gun, apply the primer evenly on the car. Don’t forget to test your spray first on a flat surface, like cardboard, before spraying it on your car.
4 Choosing the Paint

If you have chosen to entirely strip your car, then you can choose a paint that complements the trim on your car. This will require you to check the chrome work, trim, door handles and other exterior areas. You can choose the type of paint finish for your car like a matte, solid, pearl, or metallic.
It’s really up to you what color you choose but it’s good to keep in mind other factors like maintenance (which colors show dirt and damage easily), safety (dark colors are harder to spot at night), and its effect on temperature (lighter shades tend to stay cooler than darker ones).
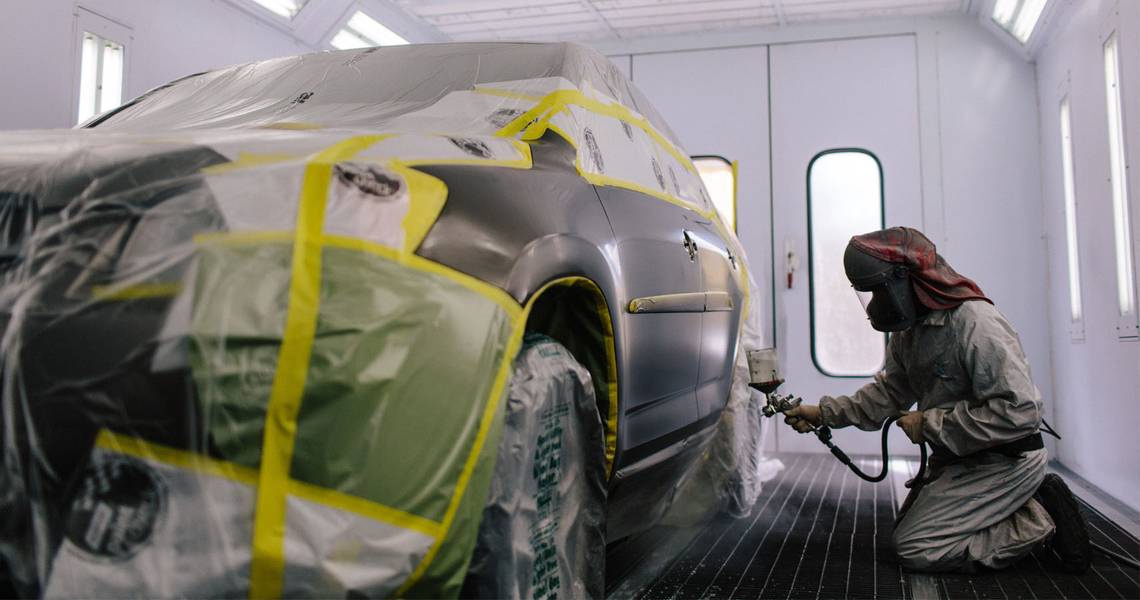
3 Paint Like a Pro

The amount of paint that you need depends on the size of your car and the surface area that needs to be painted. Since you have already used the sprayer during priming, you should have no problem painting your car. However, it’s still important to do a test spray on another surface before spraying your car.
Each panel takes about 10 minutes to be painted. Let the paint rest first before applying another coat. Depending on the paint type and ventilation, it may take up to a few hours for the paint to dry. If you don’t let the car rest, you risk the paint not adhering to the car properly, resulting in wasted time and resources since you may need to do everything again.
2 Keep an Eye on Defects

During priming and painting, you may notice small defects like bubbles, fish eyes, or an uneven application of the paint. This can be corrected with a fine sandpaper. Sand the area and spray over it. You will need to remove the masking tape just before the last layer of paint completely dries. Tape left on too long, especially when exposed to sunlight, will be brittle and difficult to remove.
It can also leave a sticky residue on the surface of the car. Use a cutting knife that is specially designed to remove paint from the tape if it clings to it. This happens when the tape is removed when the paint is wet. If the damage is extensive, simply sand the area again and repaint.
1 Finishing

If you want a glossy finish on your car, give it a good rub using the least abrasive sandpaper available. Clean the sanded area with water to ensure it’s properly sanded. If you have access to a powered buffer this will make this process a lot easier. Dab on a polishing product using a brush or a squeeze bottle. Using the lowest setting of your buffer, start working the polishing product onto the paint.
Keep the pad moving and after a few rotations, the area will start to shine. Some experienced car painters add a glazing product after, to give the car more luster. Make sure to follow all safety measures and rest in-between stages, then enjoy your newly painted car.